Step by Step Guide to Using Sleeping Pad: Ultimate Comfort Tips
Are you ready to make your next camping trip or outdoor adventure more comfortable? Using a sleeping pad might seem simple, but getting it right can transform your rest and recovery.
Whether you’re a beginner or just want to improve your setup, this step-by-step guide will show you exactly how to use your sleeping pad for maximum comfort and warmth. You’ll learn how to inflate it properly, check firmness, position it for the best support, and pack it away without hassle.
Follow along, and you’ll wake up feeling refreshed, no matter where you camp! Keep reading to discover the secrets to a good night’s sleep under the stars.
Choosing The Right Sleeping Pad
Choosing the right sleeping pad makes your camping nights comfortable and warm. It protects you from hard ground and cold temperatures. Selecting a suitable pad depends on your needs and camping style. Understanding different types and features helps you pick the best one.
Types Of Sleeping Pads
Foam pads are lightweight and durable. They offer basic comfort and insulation. Air pads inflate with air for better cushioning. They pack small but need care to avoid punctures. Self-inflating pads combine foam and air. They offer good comfort and are easy to use.
Key Features To Consider
Look for insulation value or R-value. Higher R-value means better warmth. Check the pad’s thickness for comfort. Thicker pads provide more cushion. Consider ease of inflation and deflation. Some pads include pumps or valves for fast setup. Durability matters for long trips and rough terrain.
Size And Weight Factors
Choose a pad size that fits your body length and width. A longer pad suits tall campers. Weight affects how easy it is to carry. Ultralight pads reduce pack load but may cost more. Balance size, weight, and comfort based on your trip type.

Credit: www.youtube.com
Preparing Your Sleeping Pad
Preparing your sleeping pad is the first step to a comfortable night outdoors. Proper preparation ensures you get good support and insulation from the ground. It also helps your sleeping pad last longer and stay in good condition. This section explains how to unroll, position, and understand valve types.
Unrolling And Positioning
Start by unrolling your sleeping pad on a flat surface. Make sure the ground is clean and free from sharp objects. Lay the pad where you plan to sleep, either inside your tent or directly on the ground. Position it so it fits well under your sleeping bag. This helps keep you warm and comfortable by blocking cold air from below.
Check that the pad is flat and not twisted. A smooth surface improves comfort and prevents leaks. If your pad is self-inflating, open the valve to let air fill the foam inside. For air pads, prepare to inflate using your chosen method. Proper placement is key for a good night’s rest.
Valve Types Explained
Sleeping pads have different valve types to control air flow. Knowing your valve type helps you inflate and deflate the pad easily. The most common types are twist valves, push valves, and one-way valves.
Twist valves open by turning and close by twisting shut. They allow air in or out quickly. Push valves work by pressing to release air or seal it tight. One-way valves let air enter but stop it from escaping. This type is useful for fast inflation without losing air.
Some air pads come with pump sacks that attach to the valve. These sacks fill with air and push it into the pad without moisture from your breath. Understanding your valve type makes inflation and deflation simple and efficient.
Inflating Techniques
Inflating your sleeping pad properly ensures a comfortable night’s rest outdoors. Different pads require different inflating methods. Knowing the right technique helps save time and energy. It also extends your pad’s life and improves comfort. Below are common inflating techniques to suit various sleeping pads.
Self-inflating Pads
Start by unrolling your self-inflating pad on a flat surface. Open the valve to let the foam inside expand and draw air in. Wait a few minutes as the pad fills with air naturally. Add a few breaths through the valve to reach your preferred firmness. Close the valve tightly to keep air inside. Check firmness by lying down and adjust by adding or releasing air.
Using A Pump Sack
Attach the pump sack firmly to the pad’s valve. Scoop air by opening and closing the sack quickly. Press the sack to push air into the pad. Repeat this motion until the pad is fully inflated. Remove the pump sack and close the valve tightly. This method prevents moisture buildup inside the pad and inflates faster than mouth blowing.
Mouth Inflation Tips
Open the pad valve and blow air steadily into it. Use short, controlled breaths to avoid tiring quickly. Stop blowing once the pad feels firm enough for comfort. Close the valve immediately to keep air from escaping. Avoid over-inflating to protect the pad’s seams. Consider using a pump sack if mouth inflation feels difficult or causes moisture buildup.
Adjusting Firmness For Comfort
Adjusting the firmness of your sleeping pad is key to a comfortable night outdoors. Firmness affects support and helps you avoid aches or pressure points. Each person’s comfort needs differ, so take time to fine-tune your pad. Start soft, then add air gradually to find your ideal level.
This section guides you through testing firmness, finding balance, and avoiding overinflation. Follow these steps to improve your camping rest and wake refreshed.
Testing Firmness
Lie down gently on your sleeping pad. Pay attention to how your body feels. Your hips and shoulders should not touch the ground. If you feel the hard surface, add more air for support.
Move slightly to test if the pad stays supportive. A good pad will cushion your body evenly. Adjust air slowly and retest until you feel comfortable.
Finding The Right Balance
Firmness that is too high can cause discomfort. Too soft leaves you feeling the cold, hard ground. Find a middle ground where you feel stable but cushioned.
Experiment with small air changes. Check how your body responds each time. This balance lets you sleep well without strain or sinking.
Avoiding Overinflation
Do not pump too much air into your sleeping pad. Overinflation can make the surface hard and less comfortable. It may also damage the pad over time.
Stop adding air once the pad feels firm but soft enough to mold slightly under your weight. Proper inflation ensures durability and comfort on every trip.
Optimal Sleeping Pad Placement
Optimal sleeping pad placement ensures comfort and warmth during your outdoor sleep. Proper placement prevents heat loss and adds cushioning against hard ground. It also keeps your pad stable and prevents slipping. Follow simple steps to place your sleeping pad for a good night’s rest.
Under Your Sleeping Bag
Place the sleeping pad directly under your sleeping bag. This position traps warm air between the pad and your body. It also adds a soft layer that protects you from cold, wet ground. Make sure the pad covers the full length of your bag for maximum comfort. Adjust the pad so it lies flat without folds or bumps.
Inside The Tent
Lay the sleeping pad inside your tent on a clean, dry surface. Avoid sharp objects that could puncture the pad. Position the pad so it fits well in your tent’s sleeping area. This keeps the pad stable and prevents sliding during the night. Check the tent floor for rocks or debris before placing the pad.
Securing The Pad
Secure the sleeping pad to prevent it from moving while you sleep. Some pads have straps or loops for attachment inside the tent. Use these features to keep the pad in place. If your pad lacks attachments, tuck the edges of your sleeping bag over the pad. Another option is to place a small, lightweight item on the pad’s corners. This simple step keeps your pad steady throughout the night.
Deflating And Packing
Deflating and packing your sleeping pad properly helps keep it in good shape. It also makes your gear lighter and easier to carry. Taking the right steps prevents damage and saves space in your backpack.
Opening The Valve
Start by fully opening the valve on your sleeping pad. This lets the air escape quickly. For self-inflating pads, opening the valve triggers the foam to compress. For air pads, the valve allows trapped air to flow out. Make sure the valve stays open during the whole deflation process.
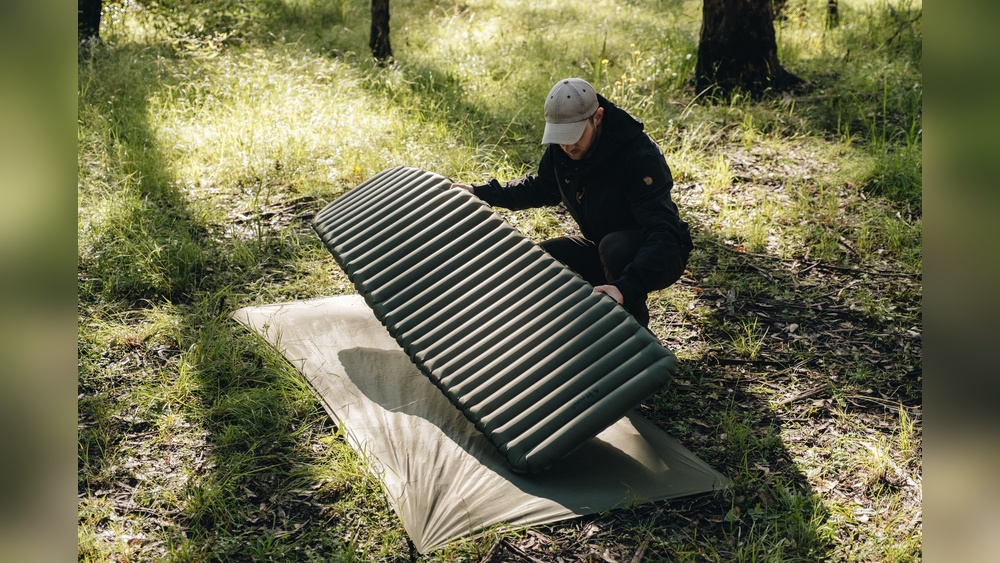
Rolling Techniques
Begin rolling your pad from the foot end. Roll slowly and firmly to push air out. Apply gentle pressure with your hands or knees as you roll. Keep the roll tight to remove as much air as possible. Near the end, open the valve again to release any trapped air. Finish rolling and close the valve to keep air from returning.
Storage Tips
Store your sleeping pad loosely if possible. Avoid long-term compression to protect the foam. Keep it in a dry, cool place away from direct sunlight. Use a storage sack or hang it to keep its shape. Clean and dry your pad before packing to prevent mold and odor.
Maintenance And Care
Proper maintenance and care keep your sleeping pad in good shape. A well-maintained pad lasts longer and stays comfortable. Follow simple steps to clean, repair, and store your pad correctly. These habits protect your investment and improve your camping experience.
Cleaning Your Pad
Cleaning your sleeping pad keeps dirt and sweat away. Use a soft cloth or sponge with mild soap and water. Gently wipe the surface to avoid damage. Avoid harsh chemicals that can weaken the material. Let the pad air dry completely before storing it. Never use a dryer or direct heat to dry your pad.
Repairing Small Holes
Small holes can cause air leaks and reduce comfort. Use a repair kit designed for sleeping pads. Clean the area around the hole thoroughly. Apply the patch according to the kit instructions. Press firmly and let it cure for several hours. Test for leaks by inflating the pad and listening for escaping air.
Long-term Storage
Store your sleeping pad in a cool, dry place to avoid damage. Keep it loosely rolled or flat to prevent creases and stress points. Avoid storing it in direct sunlight or damp areas. Check the pad periodically for damage or moisture. Proper storage helps maintain the pad’s shape and function over time.

Credit: sportssurge.alibaba.com
Extra Comfort Tips
Adding extra comfort to your sleeping pad can improve your camping nights. Small changes make a big difference. These tips help you stay warm, stable, and cozy. Follow these simple steps for a better rest outdoors.
Using Additional Insulation
Place an insulated blanket or foam sheet under your sleeping pad. This blocks cold from the ground. It adds warmth without extra weight. You can also use a reflective emergency blanket. It reflects body heat back to you. This extra layer keeps you warmer in cold weather.
Layering For Warmth
Use your sleeping pad with a good sleeping bag. Layer clothes for added warmth. Wear thermal socks and a hat to keep heat in. Avoid tight layers that restrict movement. Layering traps air and keeps body heat close. This method works well in chilly or damp conditions.
Preventing Slippage
Keep your sleeping pad from sliding by placing a non-slip mat underneath. Rubber mats or yoga mats work well. You can also use double-sided tape for extra grip. Secure the pad inside your tent to avoid movement. This helps you sleep without shifting or waking up.

Credit: www.amazon.com
Frequently Asked Questions
How To Use A Sleeping Pad?
Unroll the sleeping pad and open the valve. Inflate by blowing air or using a pump sack. Close the valve when firm. Place it under your sleeping bag for insulation and comfort. Adjust firmness by lying on it to ensure your hip barely touches the ground.
Are You Supposed To Put Your Sleeping Pad Inside Your Sleeping Bag?
You should place your sleeping pad under your sleeping bag for insulation and comfort. Putting it inside the bag is optional and may reduce comfort.
How To Inflate A Sleeping Pad With A Built-in Pump?
Unroll the sleeping pad and open the valve. Press the built-in pump repeatedly to fill with air. Close the valve when firm.
What Do You Put Under A Sleeping Pad?
Place a sleeping pad directly on the ground or inside your tent. It cushions and insulates under your sleeping bag.
Conclusion
Using a sleeping pad is simple and improves your sleep outdoors. Follow each step carefully for best results. Inflate the pad to the right firmness for comfort and support. Place it under your sleeping bag to stay warm and cushioned.
Remember to deflate and pack it properly to keep it in good shape. With practice, setup and packing become quick and easy. Enjoy restful nights on your next camping trip with your sleeping pad ready.

I am an outdoor enthusiast and gear researcher passionate about camping, hiking, backpacking, and outdoor adventures. I enjoy testing gear, comparing products, and sharing practical advice to help readers make informed decisions. At BestOutsideGear, I create honest gear reviews, buying guides, and outdoor tips to help adventurers choose the right equipment with confidence.