Step by Step Guide to Using Backpacking Tent, Best Setup Tips
Ready to make your backpacking trips more comfortable and hassle-free? Knowing how to properly use your backpacking tent can turn a challenging night outdoors into a cozy and enjoyable experience.
This step-by-step guide will walk you through setting up your tent quickly and correctly, ensuring you get the most out of your adventure. Whether you’re a first-timer or just looking to sharpen your skills, you’ll find simple tips and tricks that make pitching your tent easier than ever.
Keep reading, and by the end, you’ll feel confident and prepared for your next outdoor escape!
Choosing Your Campsite
Choosing your campsite is one of the most important steps before setting up your backpacking tent. The right spot affects your comfort, safety, and overall camping experience. Take time to find a good location that fits your needs. This helps you enjoy your trip and avoid problems during the night.
Finding A Flat Spot
Look for flat ground to pitch your tent. A level spot helps you sleep better and keeps your tent stable. Avoid slopes or uneven areas that can cause discomfort or make your tent slide. Clear the area of rocks, sticks, and debris to protect your tent floor.
Avoiding Hazards
Stay away from hazards like dead trees, loose branches, and flood zones. These can be dangerous during strong winds or rain. Avoid camping near animal trails or insect nests. Check for signs of wildlife activity to stay safe and prevent damage to your gear.
Considering Wind And Sun
Set up your tent where it gets some shelter from wind. Use natural barriers like bushes or trees as windbreaks. Morning sun helps dry your tent and keeps it warm. Avoid direct afternoon sun to prevent overheating. Position your tent door away from strong winds for extra comfort.

Credit: ampexgear.com
Preparing The Ground
Preparing the ground is a crucial first step before setting up your backpacking tent. A well-prepared site protects your tent floor and improves comfort inside. Taking time to prepare the ground helps avoid damage and keeps you dry. Follow these simple steps to get your camping spot ready.
Clearing Debris
Remove sticks, rocks, and sharp objects from the area. These items can puncture your tent floor or cause discomfort. Use your hands or a small tool to clear the ground completely. A smooth surface makes pitching the tent easier and safer.
Using A Groundsheet
Place a groundsheet or footprint under your tent. This extra layer protects against moisture and dirt. Choose a groundsheet that fits your tent size to avoid water pooling underneath. It also adds an extra barrier between the tent and rough ground.
Leveling The Area
Find a flat spot to set your tent. Uneven ground can cause discomfort and affect tent stability. Use your hands or a small shovel to fill holes and flatten bumps. A level surface helps the tent stand firm and improves your sleeping comfort.
Unpacking And Organizing
Unpacking and organizing your backpacking tent is the first step to a smooth setup. It sets the stage for a quick, stress-free experience. Taking time to arrange everything carefully helps prevent missing parts and confusion later. Follow these simple steps to get started right.
Laying Out Tent Components
Begin by spreading out all the tent parts on a flat surface. This includes the tent body, rainfly, poles, stakes, and any extra accessories. Lay each piece flat to see what you have. Organizing components in one spot keeps things tidy and easy to access.
Checking For Missing Parts
Look over each piece to make sure nothing is missing. Check the tent body for tears or damage. Count the poles and stakes to confirm you have the right number. Missing parts can ruin your trip, so double-check carefully before moving on.
Sorting Poles And Stakes
Separate poles by length or color if they differ. Group stakes by type or size. This makes it faster to grab the right piece during setup. Keep poles and stakes in a small bag or container to avoid losing them. Proper sorting saves time and frustration at the campsite.
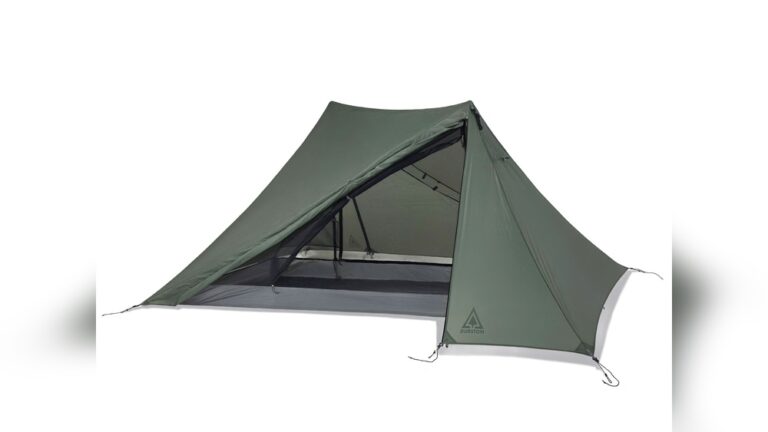
Setting Up The Tent Body
Setting up the tent body is the core step in pitching your backpacking tent. It forms the main structure and provides shelter from wind and rain. Proper setup ensures stability and comfort during your outdoor adventure.
Take your time to carefully handle each part of the tent body. Follow simple steps to avoid mistakes and save time. A well-set tent body makes the rest of the setup easier and faster.
Aligning The Tent
First, spread the tent body flat on the ground. Choose a clear, level spot free of rocks and sticks. Face the tent door in the direction you prefer.
Check that the tent edges are straight and not twisted. Align the tent corners with the footprints or groundsheet if you use one. This keeps the tent clean and protects the floor.
Inserting Poles
Identify the poles and their sections. Most backpacking tents use lightweight poles that connect easily. Assemble the poles by snapping the sections together.
Slide the poles through the corresponding sleeves on the tent body. Some tents have color-coded sleeves or clips to match poles. Handle poles gently to avoid bending or breaking them.
Once all poles are in place, raise the tent by lifting and flexing the poles into their arch shape. This creates the tent’s frame and lifts the fabric off the ground.
Securing Clips Or Sleeves
Attach the tent body to the poles using clips or by sliding fabric into sleeves. Clips snap onto poles quickly and hold the tent taut. Sleeves require sliding the poles inside the fabric channels.
Make sure the tent fabric is evenly stretched to avoid sagging. Proper tension improves wind resistance and water runoff. Check all clips or sleeves for secure attachment before moving on.
Raising The Tent
Raising your backpacking tent correctly ensures a safe and comfortable shelter. This step requires careful handling of poles, stakes, and tension adjustments. Each part works together to keep the tent stable and weatherproof. Follow these instructions to set up your tent with ease.
Erecting Poles
Begin by unfolding the tent poles. Connect all pole sections until fully extended. Insert poles through the tent’s pole sleeves or clip them to the tent body. Stand the poles upright carefully, forming the tent’s frame. Make sure poles fit securely in their joints to avoid collapse.
Attaching To Stakes
Next, place the tent on the ground and locate the stake loops. Push stakes into the ground at a 45-degree angle for strong hold. Attach the tent’s corners or loops to the stakes. This anchors the tent firmly and prevents it from moving in wind. Check each stake is firmly in the soil.
Adjusting Tension
Finally, adjust the tent fabric to remove wrinkles. Tighten guy lines and straps evenly on all sides. Proper tension keeps the tent’s shape and helps water run off. Avoid over-tightening, which can damage fabric or poles. A taut tent resists wind and rain better, keeping you dry.
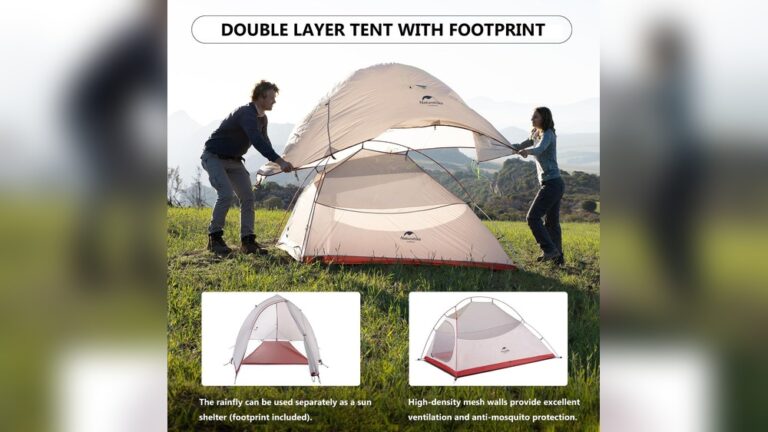
Attaching The Rainfly
Attaching the rainfly is a key step in setting up your backpacking tent. It protects you from rain, wind, and dew. A properly secured rainfly keeps you dry and comfortable during your outdoor adventure.
Follow these simple steps to attach the rainfly correctly. This ensures the best protection and ventilation for your tent.
Positioning Over The Tent
First, unfold the rainfly carefully. Spread it evenly over the tent body. Align the rainfly’s doors with the tent’s doors. Make sure it covers the tent fully from all sides. Check that the rainfly’s roof is centered on the tent’s top. This prevents water from pooling in one spot.
Securing Corners
Next, clip or tie the rainfly to the tent’s corners. Use the built-in hooks or loops on the rainfly. Attach them firmly to the tent’s corner poles or stakes. Pull the rainfly tight to avoid sagging. A tight rainfly resists wind and rain better. Secure any additional straps or guylines for extra stability.
Ensuring Ventilation
Proper airflow reduces condensation inside the tent. Make sure rainfly vents are open and unobstructed. Leave some space between the rainfly and tent body. This gap allows fresh air to enter and moisture to escape. Adjust the rainfly so it does not touch the tent’s mesh walls. Good ventilation keeps the inside dry and comfortable.
Using Guylines And Stakes
Using guylines and stakes correctly is key to securing your backpacking tent. These elements keep your tent steady against wind and rain. Proper setup prevents damage and ensures comfort during your trip.
Follow these simple steps to use guylines and stakes effectively. This guide helps you anchor your tent firmly and adjust it for maximum stability.
Anchoring Guylines
Find solid ground to anchor guylines. Use rocks or dirt to hold stakes firmly. Stretch the guylines away from the tent at an angle. This keeps the tent fabric taut and stable. Check that guylines are not loose or tangled.
Choosing Stake Angles
Insert stakes at a 45-degree angle to the ground. Point the stake tip away from the tent. This angle provides better grip and holding power. Avoid driving stakes straight down. Use a mallet or rock to push stakes deep.
Tightening For Stability
Pull guylines tight but avoid over-tightening. Tight lines keep the tent frame steady in wind. Use adjustable tensioners if your tent has them. Recheck guylines after strong wind or rain. Loose guylines can cause the tent to collapse.

Credit: www.popularmechanics.com
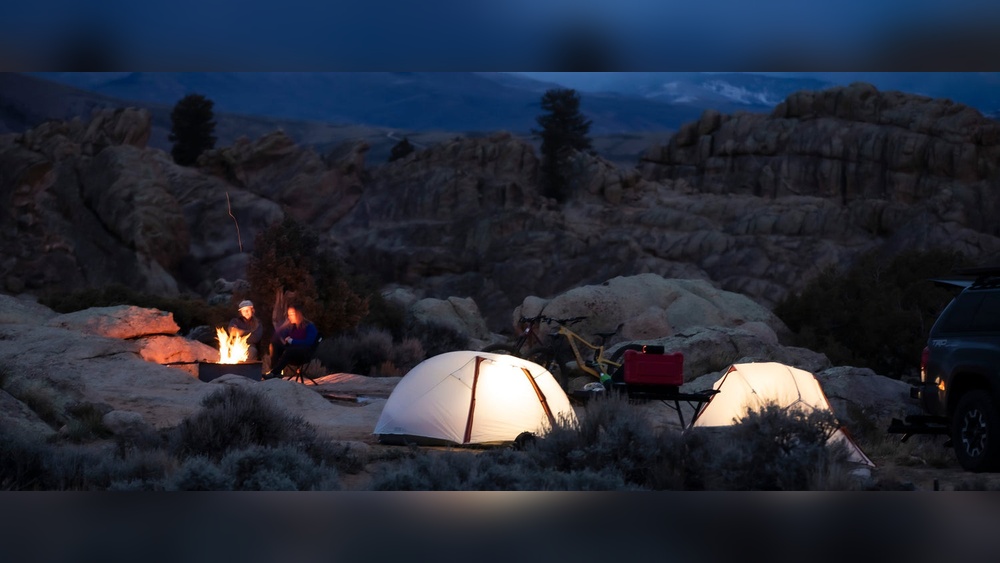
Adding Extra Protection
Adding extra protection to your backpacking tent improves comfort and safety. It shields you from rain, wind, and cold. Taking simple steps can make your tent more durable and cozy. This section covers practical ways to add protection during your outdoor adventure.
Using A Tarp
A tarp acts as a shield under or over your tent. Place it beneath your tent to stop moisture from seeping in. Make sure the tarp is slightly smaller than your tent floor. This prevents water from collecting between the tarp and tent. You can also pitch a tarp above your tent. Secure it with ropes or poles to create a rain barrier. This extra layer keeps your tent dry during heavy rain. Tarps are lightweight and easy to carry, making them perfect for backpacking.
Insulating For Warmth
Insulation keeps heat inside your tent. Use an insulated sleeping pad to block cold from the ground. Add a thermal blanket or extra sleeping bag for more warmth. Hang a reflective emergency blanket inside the tent roof. It reflects body heat back to you. Keep your tent doors zipped to keep warm air inside. Adding insulation helps you stay cozy during cold nights.
Windproofing Techniques
Strong winds can damage your tent or make it cold. Pitch your tent behind natural windbreaks like trees or rocks. Tighten all tent guy lines and stakes firmly into the ground. Use extra guylines if your tent has loops for them. Angle your tent to face the wind at its smallest side. Lower the tent’s profile by removing rainfly poles if possible. These steps reduce wind impact and keep your tent stable.
Packing And Maintenance
Packing and maintaining your backpacking tent is vital for its durability. Proper care keeps the tent fabric strong and ready for your next trip. Follow simple steps to avoid damage and extend your tent’s life.
Drying Before Packing
Always dry your tent completely before packing it away. Moisture traps mold and causes bad smells. Spread the tent out in a shaded, breezy spot. Avoid direct sunlight to protect fabric and colors. Wait until all parts feel dry to touch. Packing a wet tent can weaken the material over time.
Cleaning Tent Fabric
Use a soft brush or cloth to remove dirt. Spot clean stains with mild soap and water. Avoid harsh detergents or bleach that harm the fabric. Rinse well with clean water and let it dry fully. Clean zippers gently to prevent damage. Keeping the tent clean protects its waterproof coating.
Storing Properly
Store your tent loosely in a cool, dry place. Avoid tight compression bags for long-term storage. Use a large cotton or mesh storage sack instead. This lets the fabric breathe and prevents mildew. Keep it away from direct heat or sunlight. Proper storage maintains the tent’s shape and waterproofing.
Tips For Efficient Setup
Setting up a backpacking tent quickly and correctly saves time and energy. Efficient setup helps you avoid frustration after a long hike. Simple tips can make the process smoother and more enjoyable. These tips focus on practice, teamwork, and adapting to weather changes.
Practicing At Home
Practice setting up your tent before the trip. Find a clear spot in your yard or living room. Follow the instructions step by step. Learn how the poles fit and how to secure the rainfly. This practice helps you remember the steps and reduces setup time outdoors.
Doing this several times builds confidence. You will notice small tricks to make the process faster. It also helps spot missing parts or damaged gear early.
Working With A Partner
Setting up a tent with a partner is easier and faster. Divide the tasks, such as laying out the tent and assembling poles. Communicate clearly to avoid mistakes. One person can hold the tent while the other secures stakes.
Teamwork reduces stress, especially in low light or bad weather. Practicing together before the trip builds good habits. It makes the whole experience more enjoyable.
Handling Unexpected Weather
Weather can change quickly in the outdoors. Prepare by checking the forecast and carrying extra gear like tarps or guylines. Set up your tent in a sheltered spot if wind or rain is expected.
Work quickly to secure the tent and rainfly. Use all stakes and guylines to increase stability. In heavy rain, pitch the tent so the door faces away from the wind. This keeps water out and helps you stay dry.

Credit: www.battlbox.com
Frequently Asked Questions
How Do You Set Up A Tent Step By Step?
Choose a flat spot and clear debris. Lay the groundsheet and spread the tent body. Assemble and insert poles into sleeves or clips. Raise the tent and secure stakes at corners. Attach the rainfly and tighten guylines for stability.
Does Putting A Tarp Over A Tent Make It Warmer?
Placing a tarp over your tent adds insulation and blocks wind, helping retain heat inside. This makes the tent warmer.
Is A 4 Pound Tent Too Heavy For Backpacking?
A 4-pound tent is slightly heavy but still manageable for backpacking. Lighter tents under 3 pounds are ideal for long hikes. Consider your comfort and pack weight when choosing.
Do You Lock Your Tent At Night?
Locking your tent at night is generally unnecessary. Keep valuables secure and stay aware of your surroundings instead.
Conclusion
Setting up a backpacking tent is simple with clear steps. Choose a flat, dry spot for your tent. Lay down the groundsheet to protect from moisture. Unfold the tent body and arrange it properly. Insert the poles into sleeves or clips carefully.
Secure the tent with stakes to keep it steady. Attach the rainfly to stay dry during rain. Practice setting up before your trip to save time. Enjoy your camping with a well-pitched tent and restful nights. Following these steps makes backpacking easier and more fun.