How to Use Trekking Map: Master Navigation for Safe Adventures
Imagine standing at the edge of a trail, ready to explore, but unsure which way to go. Your trekking map isn’t just a piece of paper—it’s your key to confident navigation and a safe, enjoyable hike.
If you’ve ever felt lost or overwhelmed by complex map symbols, this guide is for you. You’ll learn simple, clear steps to read and use your trekking map like a pro. By the end, you’ll have the skills to find your path, avoid surprises, and fully enjoy every moment of your adventure.
Ready to unlock the power of your trekking map? Let’s dive in.
Choosing The Right Trekking Map
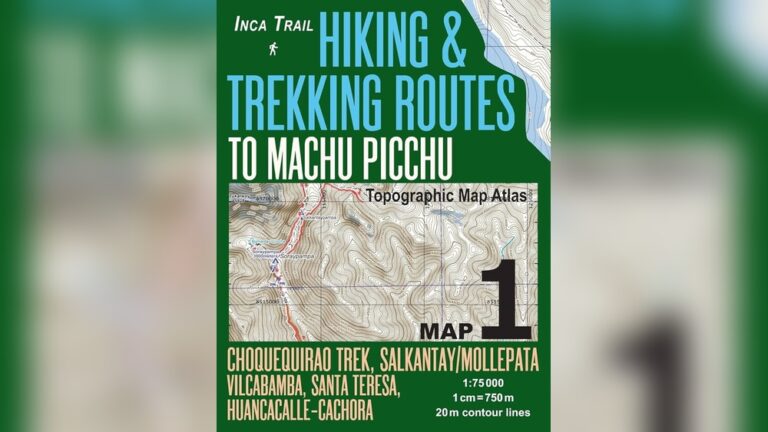
Topographic maps show hills, valleys, and land shapes with lines. They help you understand the land’s height and form. Recreational maps focus on trails, campsites, and points of interest. These maps are easier for casual hikers to use.
Choosing the right map depends on your hike. Topographic maps are best for exploring rough areas. Recreational maps work well for parks and marked trails.
| Map Type | Use | Details Shown |
|---|---|---|
| Topographic | Hiking, climbing | Elevation lines, landforms |
| Recreational | Casual hiking, camping | Trails, campsites, facilities |
Map scale tells how much land the map covers. A scale of 1:24,000 means 1 inch equals 24,000 inches on land. Smaller scale maps show larger areas with less detail. Larger scale maps show less area but more detail.
Paper maps work without batteries and can be folded easily. Digital maps are on phones or GPS devices and can zoom in or out quickly. Both have pros and cons.
Credit: en.wikipedia.org
Basic Map Features To Know
Contour lines show the shape and height of the land. Lines close together mean steep hills. Lines far apart mean flat areas. Reading these lines helps you know how hard the hike will be.
Maps use symbols to mark landmarks like rivers, lakes, and buildings. A legend or key explains what each symbol means. This helps you find your place on the map.
Trails are shown as solid or dashed lines. Different colors may show trail difficulty. Access points are where you can start or leave the trail. Knowing these helps plan your route well.
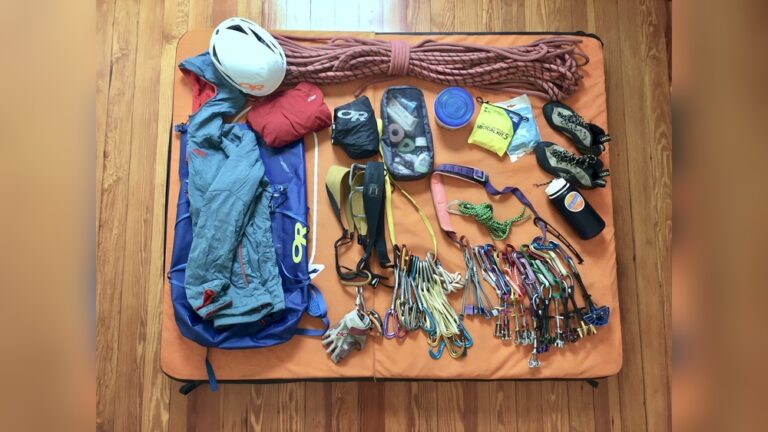
Essential Tools For Navigation
A compass helps you find directions when trekking. Hold it flat and align the needle with north on the map. This way, you know which way to go.
GPS devices give your exact location. They are handy but should not replace your map and compass. Always carry extra batteries or a power bank.
Trekking poles help with balance and reduce leg strain. They also assist in checking the ground ahead for obstacles or water depth. Use poles to steady yourself on slippery paths.

Credit: www.gojauntly.com
Preparing Your Route
Start by drawing your route on the trekking map with a pencil. This helps you see where you will go clearly. Use a ruler or the map’s scale to measure distance. This shows how far you will walk. Check the contour lines to find elevation changes. Steeper lines mean hills or mountains.
Mark important spots like water sources, shelters, and trail junctions. Use symbols or small circles to highlight these key waypoints. This makes it easier to follow your planned path while hiking. Keep your map clean and easy to read.
Map Reading Techniques On The Trail
Orienting your map with a compass helps you match the map to the real world. Place the compass flat on the map. Turn the map and compass until the compass needle points north. This shows the map’s direction is the same as the land. It makes finding your way easier.
Matching terrain with map features means looking at hills, rivers, and trails on the map. Compare these features to what you see around you. Look for shapes of mountains and paths. This helps you know exactly where you are on the trail.
| Magnetic Declination | How to Adjust |
|---|---|
| The angle difference between magnetic north and true north | Find local declination value. Rotate compass housing to add or subtract this angle. |
| Changes by location and year | Check latest maps or online sources for current declination. |
| Adjusting improves navigation accuracy | Always correct for declination before heading out. |
Safety Tips For Navigating Outdoors
Recognizing hazards starts with knowing your surroundings well. Watch for steep cliffs, loose rocks, and slippery paths. Stay clear of wild animals and poisonous plants. Always check weather changes that could make your trek unsafe.
Getting lost can be scary. Stay calm and stop moving. Use your trekking map to find landmarks around you. Try to trace your steps back to a known point. If unsure, stay put and signal for help.
Keeping your map dry and safe is very important. Use a waterproof case or a plastic bag. Avoid folding the map too much to prevent tears. Keep it in an easy-to-reach spot so you can check it often.
Improving Your Navigation Skills
Practice reading maps often to build your skills. Start with simple maps and try to find key points like trails and rivers. Use simulation apps that show different terrains and weather conditions. These apps help you understand map symbols and directions easily.
Joining guided navigation workshops offers hands-on experience. Experts teach how to use a compass and read contour lines. Group learning also helps you ask questions and learn from others’ mistakes.
| Practice Method | Benefits |
|---|---|
| Regular Map Reading | Improves recognition of landmarks and map symbols |
| Simulation and Training Apps | Safe practice in different environments and conditions |
| Guided Navigation Workshops | Hands-on learning with expert help and group support |

Credit: www.nestadventure.com
Conclusion
Using a trekking map helps you stay safe and confident outdoors. It shows trails, landmarks, and elevation clearly. Always check your location and direction often. Practice reading the map before your hike. Combining the map with a compass improves navigation skills.
Remember, careful map use prevents getting lost. Enjoy your adventure with the right tools in hand.