How to Clean a Hydration Bladder | Easy & Effective Way
You rely on your hydration bladder to keep you refreshed during hikes, runs, or bike rides. But have you ever noticed a strange taste in your water or worried about mold building up inside?
If you want to keep your hydration bladder fresh, clean, and safe to use, knowing the right cleaning methods is key. In this guide, you’ll learn simple, effective steps to clean your hydration bladder thoroughly—eliminating odors, preventing mold, and ditching that plastic taste for good.
Stick with me, and you’ll never have to worry about your water tasting off or your bladder getting gross again. Ready to make your hydration system feel like new? Let’s get started!
Credit: mazamadesigns.com
Why Clean Your Hydration Bladder
Keeping your hydration bladder clean is vital for health and enjoyment. Dirt and germs can build up inside the bladder after use. Regular cleaning stops problems before they start. Clean bladders mean fresh water and safe drinking on every adventure. Here is why you should clean your hydration bladder often.
Preventing Mold And Bacteria
Mold and bacteria grow quickly in warm, wet environments. Your hydration bladder is a perfect place for them to thrive. Drinking from a moldy bladder can cause stomach problems and infections. Cleaning removes germs and stops mold from spreading. Dry the bladder fully after cleaning to prevent mold growth.
Avoiding Plastic Taste
Old water and residues cause a bad plastic taste in your bladder. This taste spoils the flavor of your water. Cleaning removes leftover particles and keeps water tasting fresh. Using mild soap and rinsing well helps keep the bladder free of odors. Enjoy clean, fresh water every time you drink.
Extending Gear Lifespan
Regular cleaning protects your hydration bladder from damage. Dirt and mold can break down the plastic and seals over time. A clean bladder stays strong and lasts longer. Taking care of your gear saves money and reduces waste. Clean bladders perform better and stay leak-free on every trip.
Supplies Needed
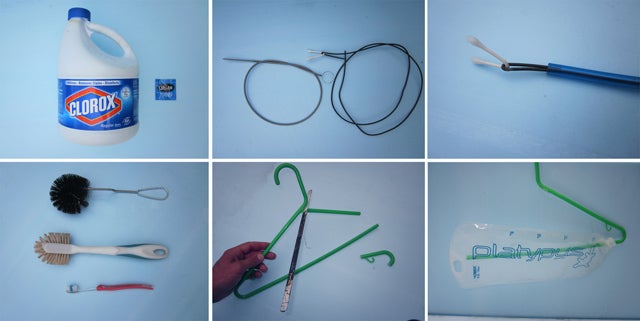
Cleaning a hydration bladder requires a few basic supplies. These items help remove bacteria, mold, and unpleasant tastes. Using the right tools makes the process easier and more effective.
Gathering proper supplies ensures a thorough clean and extends the bladder’s life. You will need simple household items and some specialized tools designed for hydration bladders.
Warm Water And Mild Dish Soap
Start with warm water and mild dish soap to clean your bladder. Avoid harsh chemicals that can damage the material or leave residue. Warm water helps loosen dirt and grime inside the reservoir and tube. Mild soap effectively breaks down oils and bacteria without causing harm.
Use a gentle dish soap that does not have strong fragrances or additives. This keeps your hydration bladder safe and fresh for the next use.
Cleaning Brushes And Kits
Cleaning brushes help reach tight spaces inside your bladder and hose. Special kits often include a long brush for the reservoir and thin brushes for the tube. These tools remove mold, dirt, and buildup that soap and water alone cannot reach.
Brush kits designed for hydration bladders come with flexible handles. They make scrubbing easier and prevent damage to the bladder’s interior. Using these brushes regularly keeps your bladder clean and odor-free.
Effervescent Cleaning Tablets
Effervescent tablets dissolve in water to kill bacteria and remove stains. They offer a deeper clean without much effort. Just drop a tablet into the bladder filled with water, let it fizz, then rinse thoroughly.
These tablets are safe for most hydration bladders and help eliminate stubborn odors. They are a simple and effective addition to your cleaning routine.
Drying Accessories
Proper drying prevents mold and mildew growth inside your bladder. Drying accessories include hangers, drying racks, or inserts that keep the bladder open. Good airflow inside the bladder speeds up drying and stops moisture buildup.
Use a clean towel to wipe the outside and let the inside air dry completely. Avoid storing the bladder while damp to keep it fresh and ready to use.
Basic Cleaning Steps
Cleaning your hydration bladder regularly keeps your water fresh and safe. The process is simple and takes only a few steps. Follow these basic cleaning steps to maintain your bladder and avoid mold or bad taste.
Disassemble The Bladder
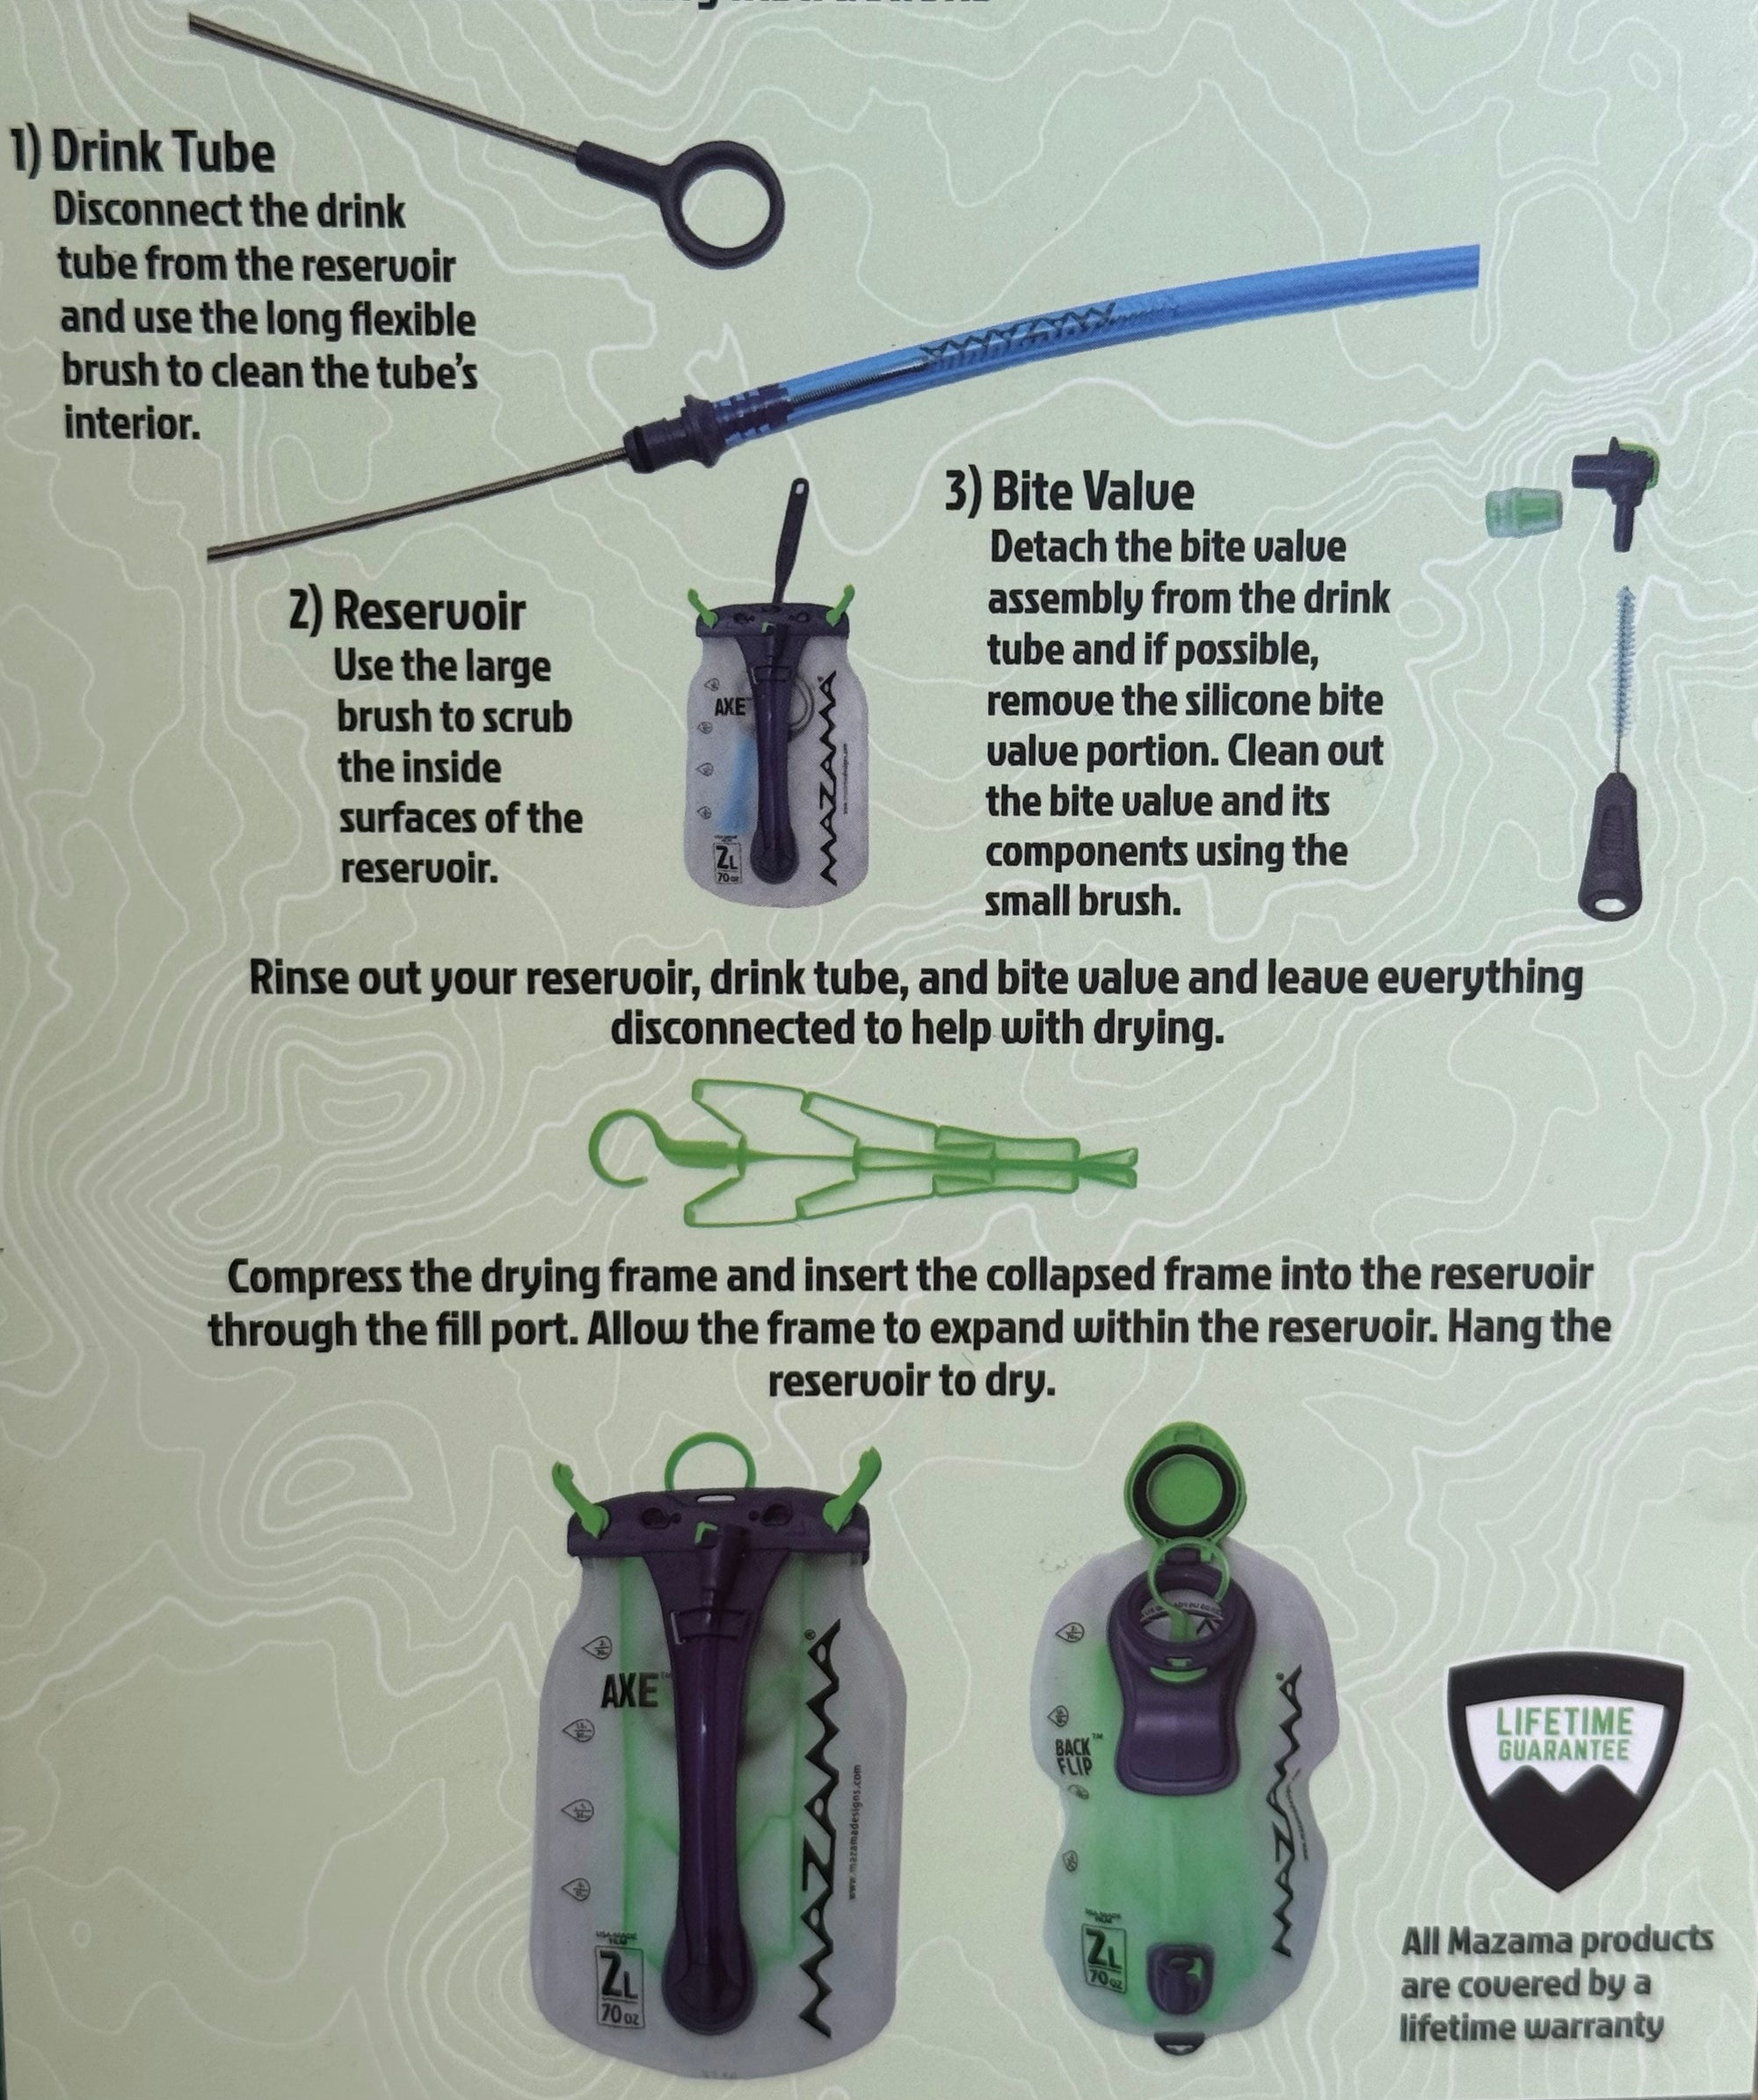
Start by taking apart the hydration bladder. Remove the hose and bite valve from the reservoir. This makes cleaning easier and more thorough. Check for any dirt or debris inside the parts.
Soak With Soap Solution
Fill a basin with warm water and add mild dish soap. Submerge the reservoir, hose, and bite valve in the solution. Let them soak for about 10 to 15 minutes. This loosens any buildup inside the bladder.
Scrub Reservoir And Hose
Use a soft brush or sponge to clean the inside of the reservoir. For the hose, use a long, thin brush designed for hydration tubes. Gently scrub all surfaces to remove residue and bacteria. Pay special attention to corners and crevices.
Rinse Thoroughly
Rinse all parts under running water until no soap remains. Make sure the water flows through the hose to flush out any trapped soap. Proper rinsing prevents soap taste in your water later.
Air Dry Completely
Hang the bladder and hose upside down to air dry. Leave the parts open and separated for faster drying. Make sure everything is fully dry before storing to prevent mold growth.
Deep Cleaning Techniques
Deep cleaning your hydration bladder keeps it safe and fresh. Regular cleaning removes bacteria and buildup inside the reservoir. It also prevents unpleasant tastes and smells. These deep cleaning techniques help maintain your bladder’s hygiene over time. Use the right methods for stubborn odors and mold. Follow these simple steps to extend your bladder’s life and enjoy clean water on every adventure.
Using Cleaning Tablets
Cleaning tablets dissolve dirt and bacteria inside the bladder. Drop the tablet into warm water filled in the reservoir. Let it soak for 30 to 60 minutes. The tablet cleans hard-to-reach areas without scrubbing. After soaking, rinse the bladder thoroughly with clean water. Repeat if the taste or smell persists. Cleaning tablets are safe and easy to use. They save time and reduce manual effort.
Removing Stubborn Odors
Stubborn odors come from bacteria and leftover water. Mix one part baking soda with four parts warm water. Fill the bladder with this solution and shake it well. Let it sit for a few hours or overnight. Baking soda neutralizes bad smells naturally. Rinse the bladder several times with fresh water. Air dry completely before storing. This method is gentle and effective for odor removal.
Getting Rid Of Mold
Mold can grow if the bladder stays wet for too long. Use a mixture of two tablespoons of white vinegar and one liter of warm water. Fill the bladder and hose with the solution. Let it soak for at least 30 minutes to kill mold spores. Use a soft brush to scrub any visible mold. Rinse well with clean water to remove vinegar smell. Dry the bladder fully in a sunny spot or hanging open.
Drying And Storage Tips
Proper drying and storage keep your hydration bladder fresh and ready. Moisture left inside can cause mold and bad smells. Drying the bladder completely is essential for long-lasting use. Correct storage also helps keep the bladder clean and safe.
Hanging The Bladder Upside Down
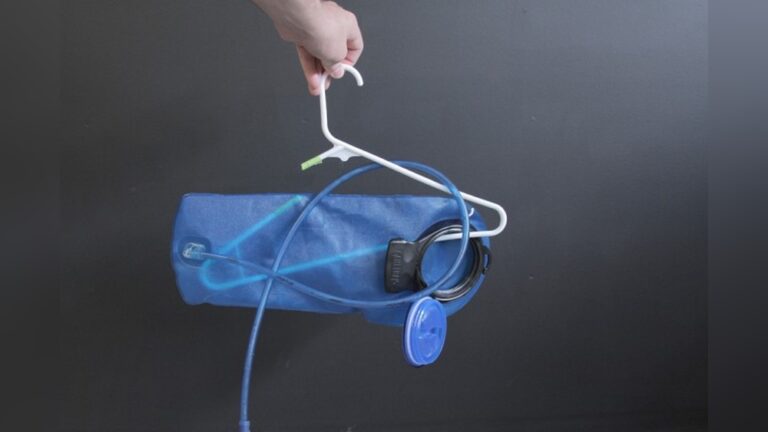
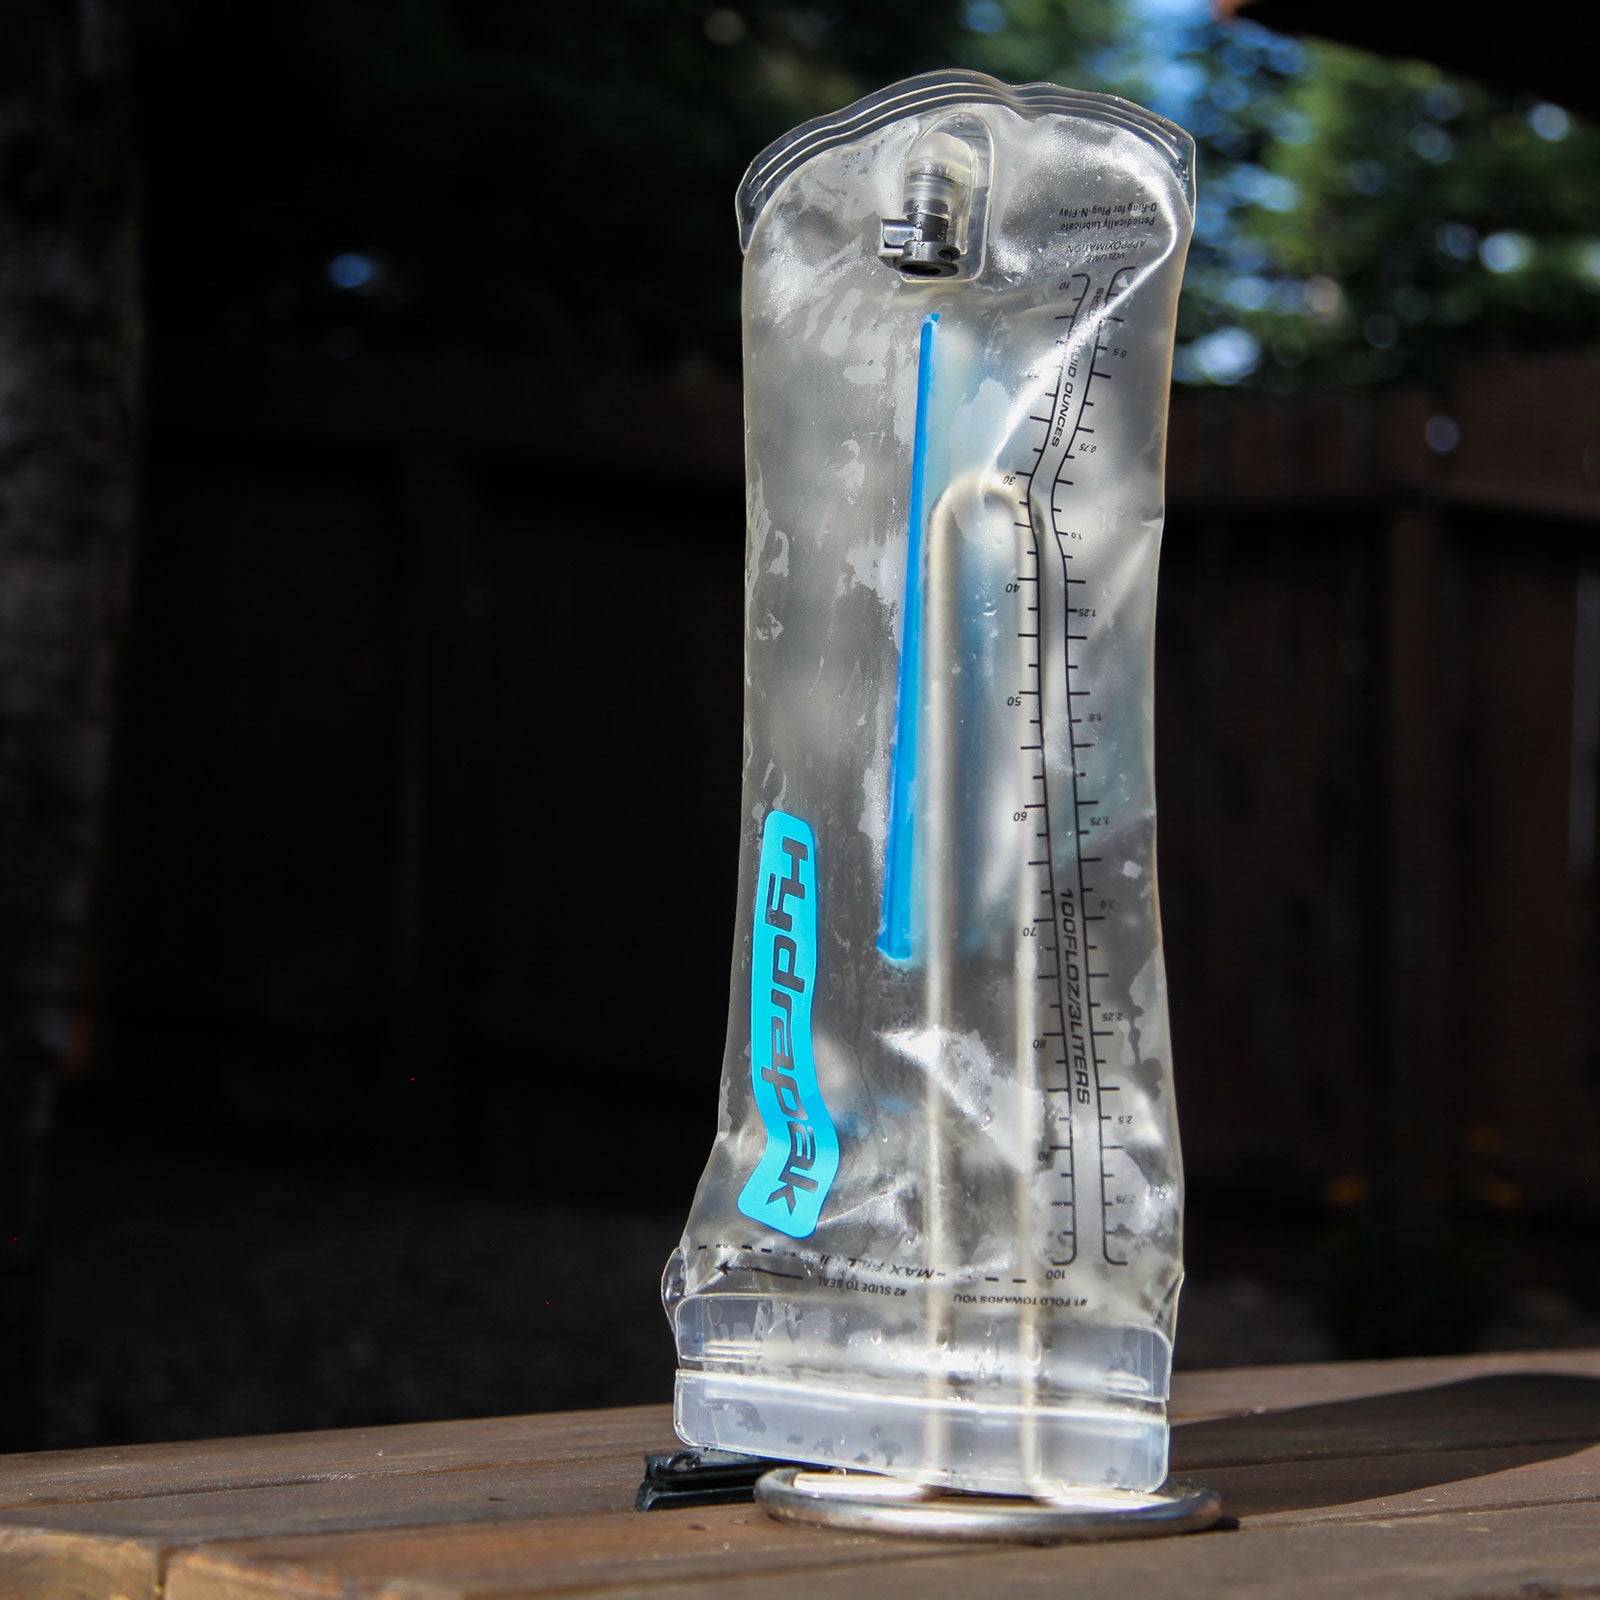
Hang the bladder upside down to let water drain fully. Gravity helps pull water out from all corners. Use a hanger or hook in a well-ventilated spot. This position speeds up drying and stops moisture buildup.
Maintaining Airflow Inside
Keep airflow inside the bladder by propping the opening open. You can use a clean utensil or a specialized drying rack. Air circulation prevents mold and mildew from forming. Make sure the bladder is in a dry, cool place.
Freezer Storage Method
Store your dry bladder in the freezer to prevent mold and bacteria. Place the bladder in a sealed plastic bag before freezing. This method keeps the bladder fresh between uses. Thaw it fully before filling with water again.
Credit: www.outsideonline.com
Cleaning Frequency
Keeping your hydration bladder clean depends on how often you use it. Regular cleaning stops mold, bacteria, and bad smells. It also keeps your water tasting fresh and safe to drink. Different cleaning routines help maintain your bladder based on use and time. Follow these guidelines to know when to clean your hydration bladder for the best results.
After Each Use
Empty the bladder right after finishing your water. Rinse it well with warm water to remove leftover liquids. Use mild dish soap if you can. Dry the bladder completely by hanging it open. This prevents mold and keeps it fresh for the next use.
Weekly Maintenance
If you use your bladder often, clean it once a week. Fill it with warm water and soap, then scrub inside. Use a cleaning brush for the hose and bite valve. Rinse everything thoroughly to avoid soap residue. Let all parts dry fully before storing.
When To Deep Clean
Deep clean if you see mold or smell bad odors. Use a mix of baking soda and water or lemon juice for tough stains. Let the solution sit inside for a few hours. Scrub all parts carefully, then rinse well. Deep cleaning keeps your bladder safe and extends its life.
Common Mistakes To Avoid
Cleaning a hydration bladder is important to keep water fresh and safe. Many people make simple mistakes that can cause damage or leave mold inside. Avoiding these errors helps your bladder last longer and taste better. Here are common mistakes to avoid for a clean and healthy hydration bladder.
Using Harsh Chemicals
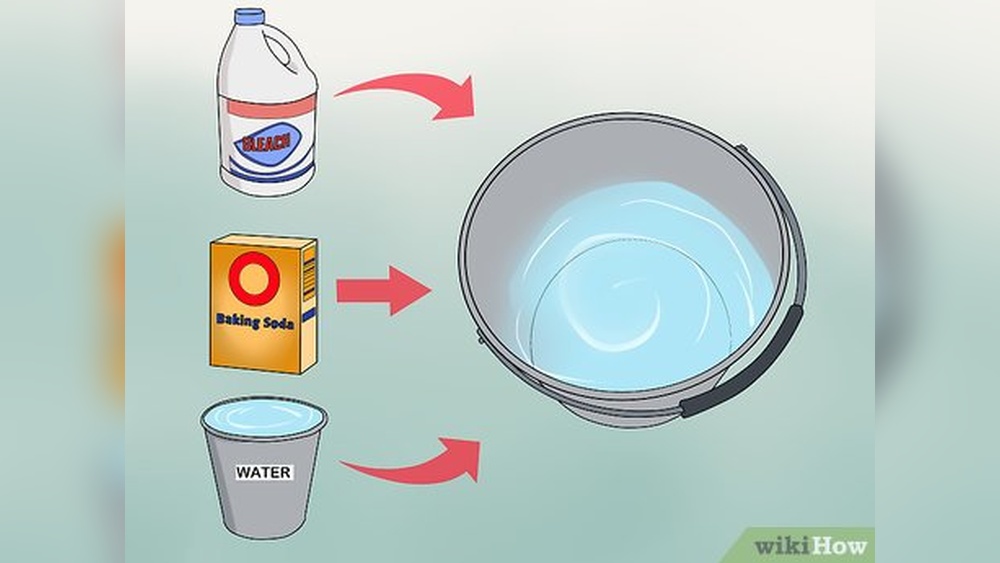
Harsh chemicals can damage your bladder’s material. Avoid bleach or strong cleaners. These can leave harmful residues or cause leaks. Use mild dish soap or special cleaning tablets instead. They clean well without hurting the bladder or affecting the taste.
Not Drying Properly
Moisture inside the bladder causes mold and bad smells. Always dry your bladder completely after cleaning. Hang it upside down with the cap open. Use a clean towel or drying rack if needed. Proper drying keeps your bladder fresh and ready to use.
Ignoring Small Parts
Small parts like the hose and bite valve can trap dirt and bacteria. Clean them carefully every time. Use a brush or pipe cleaner to reach inside. Neglecting these parts can lead to mold growth and blockages. Clean all pieces to keep water flowing and healthy.
Tips For Fresh Tasting Water
Keeping water fresh in your hydration bladder makes drinking more enjoyable. Simple steps help prevent stale or plastic tastes. Clean water encourages you to drink more during outdoor activities. Follow these easy tips for fresh tasting water every time.
Lemon Juice Rinse
Lemon juice naturally removes odors and plastic taste. Mix lemon juice with warm water and fill the bladder. Let it sit for 10 to 15 minutes. Rinse well with clean water before use. This method refreshes the bladder without harsh chemicals.
Regular Cleaning Routine
Clean your bladder after every use to avoid buildup. Use warm water and mild dish soap for washing. Scrub the inside with a soft brush or cleaning kit. Dry the bladder completely to stop mold growth. A regular routine keeps water tasting fresh and safe.
Replacing Old Bladders
Old bladders can hold odors even after cleaning. Replace your hydration bladder every 1 to 2 years. Check for cracks or discoloration as signs to change it. A new bladder ensures fresh water and better hygiene. Don’t wait for bad taste to switch it out.
Credit: www.outsideonline.com
Conclusion
Cleaning your hydration bladder keeps water fresh and taste-free. Use warm water and mild soap for all parts. Scrub gently to remove dirt and mold. Rinse well to avoid soap residue. Always dry the bladder fully to prevent mold growth.
Store it in a cool, dry place. Regular cleaning extends the life of your bladder. A clean bladder means safer and better hydration on your adventures. Simple steps make maintenance easy and effective. Stay hydrated and enjoy every sip without worry.

I am an outdoor enthusiast and gear researcher passionate about camping, hiking, backpacking, and outdoor adventures. I enjoy testing gear, comparing products, and sharing practical advice to help readers make informed decisions. At BestOutsideGear, I create honest gear reviews, buying guides, and outdoor tips to help adventurers choose the right equipment with confidence.