Step by Step Guide to Using Camping Coffee Maker: Brew Perfect Coffee
Are you ready to enjoy a fresh, hot cup of coffee while surrounded by nature? Using a camping coffee maker might seem tricky at first, but with the right steps, you can brew the perfect cup every time.
Whether you’re a camping newbie or a seasoned adventurer, this step-by-step guide will walk you through the simple process of making great coffee outdoors. Get ready to wake up your senses and start your day energized—your perfect camp coffee experience is just a few steps away! Keep reading to discover how easy and rewarding it is to use your camping coffee maker like a pro.
Choosing The Right Camping Coffee Maker
Choosing the right camping coffee maker is key to enjoying fresh coffee outdoors. The perfect coffee maker fits your style and camping needs. Consider the type, material, and size before buying. These factors affect how easy and enjoyable your coffee moments will be.
Types Of Camping Coffee Makers
There are several types of camping coffee makers. French press models brew rich coffee with a simple plunger. Percolators boil water and cycle it through coffee grounds. Pour-over kits use filters and need hot water poured manually. AeroPress machines combine pressure and immersion for smooth coffee. Each type suits different tastes and camping styles.
Materials And Durability
Camping coffee makers come in various materials. Stainless steel is strong and lasts long. Aluminum is lightweight but can dent easily. Plastic models are light but less durable. Choose materials that handle heat and rough use. Durable coffee makers withstand outdoor conditions well.
Portability And Size
Size matters for camping gear. Smaller coffee makers save space in your backpack. Lightweight designs reduce load and ease transport. Consider how many cups you want to brew at once. A compact coffee maker fits well in most camping setups. Portability helps you enjoy coffee anywhere.
Preparing Your Coffee Maker
Preparing your camping coffee maker is the first step to enjoy fresh coffee outdoors. Proper preparation ensures a clean, safe, and flavorful brew. It saves time and avoids mistakes during the brewing process. Follow these simple steps to get your coffee maker ready for use.
Cleaning Before Use
Start by cleaning your coffee maker thoroughly. Use warm water and mild soap to remove dust and dirt. Rinse all parts well to avoid soap taste in your coffee. Dry the coffee maker completely before packing it for your trip. Clean equipment helps keep your coffee fresh and tasty.
Gathering Necessary Supplies
Collect all items needed for brewing coffee. This includes water, coffee grounds, filters if needed, and your camping coffee maker. Bring a heat source such as a camp stove or fire. Carry a stirring spoon and a cup for drinking. Having all supplies ready makes brewing smooth and quick.
Selecting Coffee Grounds
Choose coffee grounds based on your brewing method. For a percolator, use medium grind coffee. Too fine grounds can clog the filter and make bitter coffee. Coarse grounds suit French press style makers. Fresh coffee grounds give the best flavor. Pack coffee in a sealed container to keep it fresh.
Measuring Coffee And Water
Measuring coffee and water is the first step to a great camping coffee experience. The right amounts help you enjoy balanced flavor and avoid bitterness or weakness. Precise measuring ensures the best taste from your camping coffee maker.
Ideal Coffee-to-water Ratio
The standard coffee-to-water ratio is 1:15. This means one part coffee to fifteen parts water. For example, use 2 tablespoons of ground coffee for 1 cup of water (8 ounces). This ratio creates a smooth and well-balanced brew. It is a good starting point for most camping coffee makers.
Measure coffee with a spoon or small scale for accuracy. Use clean, fresh water for the best flavor. Avoid guessing amounts to prevent weak or bitter coffee. Consistency in measuring helps you learn your perfect brew over time.
Adjusting Strength Preferences
Adjust coffee or water amounts to make your coffee stronger or lighter. Add more coffee grounds for a bolder taste. Use less coffee or more water for a milder cup. Small changes can make a big difference in flavor.
Try different ratios until you find what suits your taste. Keep notes on your adjustments during camping trips. This practice helps you brew your ideal cup every time outdoors.
Setting Up The Coffee Maker
Setting up your camping coffee maker correctly is key to brewing a fresh and tasty cup. This process is simple and quick. Follow these steps to prepare your coffee maker for the best results.
Filling Water Chamber
Start by filling the water chamber with clean, cold water. Use the measuring marks on the chamber to add the right amount. Do not overfill; too much water can cause spills or weak coffee.
Adding Coffee Grounds
Place the basket or filter in the coffee maker. Add fresh coffee grounds to the basket. Use a medium grind for best flavor. Avoid packing the grounds too tight to let water flow evenly.
Assembling The Parts
Put the basket or filter back into the coffee maker. Secure the lid tightly to prevent leaks. Check that all parts fit snugly. Proper assembly ensures smooth brewing and easy cleaning.
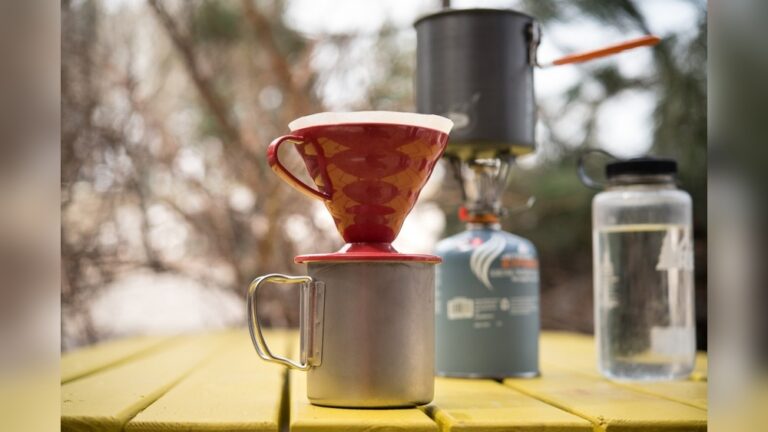
Brewing Process
The brewing process is the heart of making coffee with a camping coffee maker. It transforms simple ingredients into a warm, fresh cup. Each step affects the flavor and strength of your coffee. Paying attention to details ensures a satisfying brew every time you are outdoors.
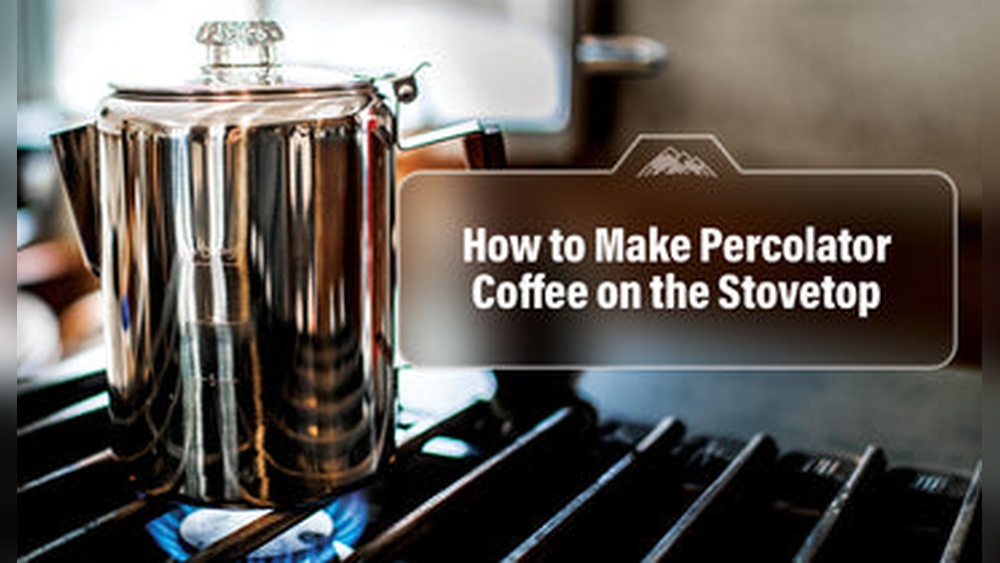
Placing On Heat Source
Start by placing your camping coffee maker on a stable heat source. This can be a camp stove, portable burner, or campfire. Make sure the flame or heat is steady and not too high. Position the coffee maker so it sits securely and heats evenly.
Monitoring Brewing Time
Watch the brewing time carefully. Most camping coffee makers need about 5 to 10 minutes to brew. Too little time means weak coffee. Too long makes it bitter. Keep a close eye on the clock and the bubbling sound for cues.
Controlling Heat Levels
Adjust heat to maintain a gentle boil or simmer. High heat can burn coffee grounds and cause bitterness. Lower heat helps extract smooth flavors. Turn down the flame if the coffee maker boils too fast or loudly. Aim for a steady, calm brew.

Credit: cafely.com
Checking Coffee Readiness
Checking coffee readiness is crucial for a great camping coffee experience. It helps you avoid weak or bitter coffee. Knowing when your coffee is ready ensures you enjoy rich flavors and a satisfying cup. Pay close attention to the signs of a perfect brew and learn how to prevent over-extraction.
Signs Of Perfect Brew
Look for a deep, rich color in the coffee. The aroma should be strong but not burnt. A gentle bubbling sound signals the coffee is brewing properly. The coffee surface will show slight steam and a smooth texture. Taste a small sip to check balance. It should be bold with no sour or bitter notes. These signs mean your coffee is ready to drink.
Avoiding Over-extraction
Over-extraction causes bitter, harsh flavors. Stop brewing as soon as the coffee reaches a dark brown color. Avoid boiling the coffee for too long. Use medium heat to keep the process steady. Remove the coffee maker from heat once you hear a gentle simmer. Stirring too much can also lead to over-extraction. Keep your brew time between 5 to 7 minutes for the best taste.
Serving Your Camp Coffee
Serving your camp coffee is the final step to enjoy a rich and warm cup outdoors. It sets the mood for a relaxing morning or a cozy evening by the fire. Pouring and enhancing your coffee can make your camping experience even better. Here are simple tips to serve your camp coffee perfectly.
Pouring Techniques
Pour slowly to avoid spills and splashes. Use a sturdy camping mug that keeps the heat well. Hold the pot close to the cup to control flow. Pour in a gentle, steady stream for smooth coffee. Avoid rushing to keep grounds from spilling into the cup.
Enhancing Flavor Outdoors
Add a pinch of cinnamon or nutmeg for a warm twist. Use fresh water for each brew to keep coffee clean. Try a little powdered milk or creamer to soften bitterness. Sweeten lightly with sugar or honey for natural sweetness. Fresh air and nature’s calm bring out coffee’s true taste.

Credit: coletticoffee.com
Cleaning After Use
Cleaning your camping coffee maker after use keeps it in good condition. Dirt and leftover coffee can spoil the taste next time. Regular cleaning also helps the coffee maker last longer. Follow simple steps to clean it well and store it safely.
Disassembling The Coffee Maker
Start by taking apart the coffee maker carefully. Remove the lid, filter basket, and pot. Check for small parts like screws or seals. Keep all pieces together so nothing gets lost. This makes cleaning easier and more effective.
Proper Washing Methods
Use warm water and mild soap to wash each part. Avoid strong detergents that can damage the coffee maker. Gently scrub with a soft sponge or cloth. Rinse all parts thoroughly to remove soap residue. Dry each piece with a clean towel or air dry completely.
Storage Tips
Store the coffee maker in a dry place after cleaning. Keep it disassembled or loosely assembled to avoid trapped moisture. Use a cloth bag or container to protect from dust. Proper storage prevents mold and keeps your coffee maker ready for the next trip.
Tips For Better Camping Coffee
Good camping coffee starts with simple, smart choices. Small details make big differences in taste. Try these tips to improve your camping coffee experience. They help you enjoy richer, smoother coffee outdoors.
Using Fresh Water
Use fresh, clean water for every brew. Water quality affects coffee flavor the most. Avoid using water that tastes or smells bad. If possible, use filtered or bottled water. Cold water heats evenly, giving better extraction.
Grind Size Recommendations
Match grind size to your coffee maker type. For percolators, use a coarse grind to avoid bitterness. Fine grinds can clog and over-extract. Adjust grind size if coffee tastes too weak or too strong. Testing helps find your perfect grind.
Experimenting With Recipes
Try different coffee-to-water ratios for best taste. Start with one to fifteen as your ratio. Add more coffee if you want stronger flavor. Change brew time slightly to adjust strength. Add spices like cinnamon for a unique twist.

Credit: cafely.com
Frequently Asked Questions
How Do I Use A Camping Coffee Maker Step By Step?
Start by filling the percolator with water below the basket. Add ground coffee into the basket. Assemble the parts and place the maker on a heat source. Heat until coffee percolates and brew to desired strength. Remove from heat and serve.
What Coffee Grind Size Suits Camping Coffee Makers?
Use a medium-coarse grind for camping coffee makers. This size prevents grounds from slipping through the filter. It also ensures balanced extraction for a smooth, flavorful cup outdoors.
How Much Water And Coffee To Use For Camping Coffee?
Use a ratio of 1 to 2 tablespoons of coffee per 6 ounces of water. Adjust to taste preference. This ratio helps produce a strong and delicious brew while camping.
Can I Use Any Heat Source For Camping Coffee Makers?
Yes, camping coffee makers can be used on campfires, portable stoves, or gas burners. Ensure stable placement and controlled heat to avoid burning the coffee.
Conclusion
Using a camping coffee maker can truly enhance your outdoor experience. Follow each step carefully to enjoy fresh coffee every time. Simple tools and patience make brewing easy and fun. Remember to adjust water and coffee amounts for taste. Clean your coffee maker after use to keep it ready.
Enjoy the warmth and flavor of your camp coffee. Now, you are ready to start your next adventure with a perfect cup. Happy camping and happy brewing!

I am an outdoor enthusiast and gear researcher passionate about camping, hiking, backpacking, and outdoor adventures. I enjoy testing gear, comparing products, and sharing practical advice to help readers make informed decisions. At BestOutsideGear, I create honest gear reviews, buying guides, and outdoor tips to help adventurers choose the right equipment with confidence.